Christmas Table Settings!


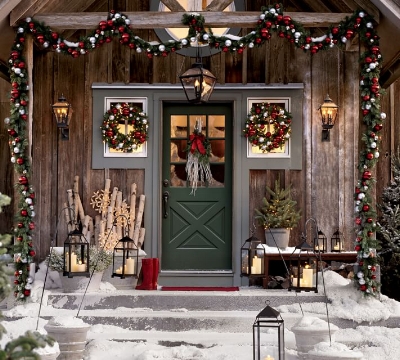
When decorating for the Christmas season many people remember to decorate the Christmas tree, the exterior of your home, the fireplace mantle...but what about the dining room table??


You want your dinner guests to feel transformed with holiday spirit immediately upon entering the dining room! Decorating your holiday dinner table is an amazing way to make the day even more memorable!


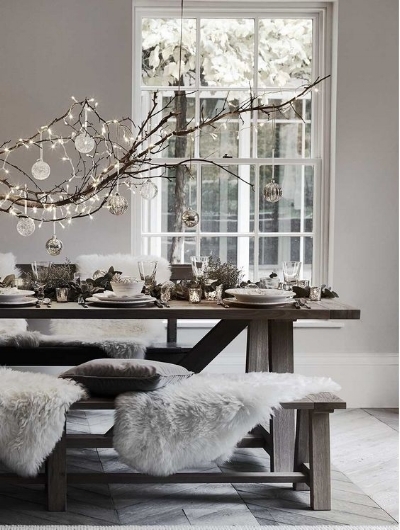
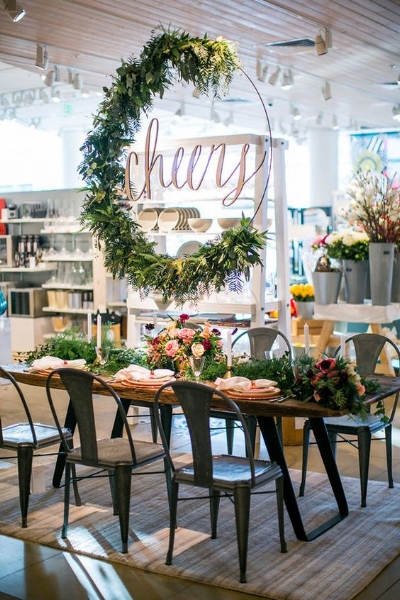
If you’re looking to create impact, you can’t beat a striking colour scheme. Silvers and golds create a classic feel, while purples, blues, and black establish more of a modern look. You can’t go wrong with crisp white table linens as they add freshness and pair perfectly with metallic ornamental touches. You can also have fun with Christmas tree bulbs too! Scatter them along the table or hang them from the light fixture above!


Don’t forget that your guests always love to have some fun too! Get some holiday crackers and fun party favours that match your table theme! After all, it’s Christmas!

Which table setting is your favorite?? Comment below!

More Christmas blogs to come!

-MW

Outdoor Christmas Decor!

There's a snowstorm in St. John's today and a lot of people have a snow day! So I thought it was a good opportunity to provide everyone with some reading material! You're all very welcome. :)

I've had a few requests for outdoor Christmas decor - so here we go!

Whether your style is traditional, contemporary, or somewhere in between, the front entrance of your home has a huge impact on visitors, friends&family, or the post man dropping of your Christmas packages! It's the first impression someone has before entering your home - celebrate Christmas with style by accentuating your home's most complimentary features!

I went through tons of photos of exterior Christmas decorations and picked out my favourites! Check out the pictures below and see if there's one that inspires you!  

DIY Christmas Wreath!


I saw this wreath on Better Homes&Gardens website a few years ago and had a major "I can totally make that" DIY moment.


After I made the wreath for myself, I ended up getting tons of compliments on it! Since then I've made a few more and have given them to friends & family for Christmas gifts! The end result is beautiful and it's incredibly simple to make!


So today the blog, we are making a wreath! 

Here's how you do it:


Step 1: Buy/Make a Pinecone Wreath
I was lucky enough to find a pine cone wreath at winners that would work for what I needed. But if you can't find one, you can always get a styrofoam wreath ring and hot glue gun pine cones to it to make your wreath - that way you can make your wreath any size you want.

Step 2: Spray Paint
The wreath in the picture above was covered in grey spray paint. I opted for a flat white spray paint for my wreath because the walls in my house are already grey and I didn't want the wreath to be totally lost against the background - you can use whatever works for you! Silver or a similar metallic colour would also work really well.

Note: If your wreath is made out of a styrofoam wreath ring, use a water based spray paint. The chemicals in regular spray paint tend to eat through styrofoam and cause it to disintegrate. I ran into this problem before and it was a total nightmare - not knowing the difference, I used regular spray paint on styrofoam and the project I was working on melted in seconds right in front of my face. I was devastated.
Now you can't say I didn't warn you.

Step 3: Place Your Ornaments
Once the spray paint has dried, it's time to figure out where to place your ornaments on your wreath. I was able to find three red cardinals and some small red non-shattering christmas bulbs at Michaels but I'm sure you could find them at any craft store around now where Christmas is in full swing.

I used 4 red miniature bulbs and 5 red small bulbs. Before I attached the ornaments, I laid the wreath down flat on a table and placed the ornaments so that I could decide where I wanted to position all the pieces. Once I was happy with the look I used a hot glue gun to stick the pieces on. Once all the ornaments are glued onto the wreath, wait a few minutes and then wiggle each ornament just to make sure they're secure - you may need to add a bit more hot glue if any are loose.

Here is a picture of my final result:

Hope the wreath inspires you to create your own or maybe DIY another design! 

Let me know what you think in the comments below! More blogs to come!

-MW